How to create Full-stack applications in Flutter using gRPC
gRPC is an open-source high-performance remote procedure call(RPC) framework created by Google.
Remote Procedure Calls enable one machine to invoke code on another machine as if it is a local function from a user’s perspective. You use protocol buffers to define RPC as its interchange format to encode data.
Instead of relying on JSON, a text-based format, gRPC uses protocol buffers with binary encoding to transmit data. This results in much greater efficiency when transmitting data over a network than text-based formats like JSON.
gRPC uses the HTTP/2 protocol and is designed to be efficient, scalable, and secure.
This article will teach you how to use gRPC in Flutter to develop full-stack applications effectively.
Table of Contents
- Table of Contents
- Optional methods of creating Full-stack apps in Flutter
- Communication Patterns in gRPC
- gRPC vs REST
- Protocol Buffers
- Project
- gRPC in action
- Conclusion
- References
Optional methods of creating Full-stack apps in Flutter
In order to create Full-stack apps in Flutter using gRPC, it's important to have a strong grasp of the current techniques for developing such applications. Additionally, it is crucial to be aware of any potential drawbacks associated with these approaches.
- Using a REST API
To develop a full-stack application in Flutter using a REST API, you’ll need to set up a server for the API. This can be done using Dart or other languages like Node.js or Python. The API server will handle all the data processing and business logic, while the Flutter app will consume the data and functionality provided by the API through HTTP endpoints.
Downsides😞
- In REST, JSON is commonly utilized without any type of specification. This can lead to misinterpretation of data, so it is essential to implement data validation methods to prevent such issues.
- REST does not explicitly support streaming data(only request-response). You could surely use some tools such as WebSockets but you’ll see how easy it is to implement this using gRPC
- It can be difficult for developers proficient in one programming language to acquire the necessary skills to develop the backend using another language.
- Using Firebase
Integrating Firebase services into your Flutter application is a great way to create full-stack applications. With Firebase, you can access a range of services such as Firebase Authentication, Cloud Firestore, Cloud Functions, Cloud Storage, etc.
Downsides😞
- Vendor lock-in. Once you start using Firebase, it can be challenging to move to another platform. This is because Firebase uses its own proprietary data formats and APIs.
- Limited customization. Firebase is a robust platform, but it has some limitations when it comes to customization. This is because Firebase is intended to be an all-in-one platform, complete with pre-built features. If you require specific customization to meet your needs, you may need to develop custom code.
- Cost. Firebase is not free to use. There are free tiers for some Firebase services, but you will need to pay for more advanced features. The cost of Firebase can vary depending on the amount of traffic your application receives and the number of features you use.
- Data migration. Challenging to migrate data from Firestore unlike in SQL databases where you can just write queries.
It is likely that you have used the mentioned options, including GraphQL, to develop full-stack Flutter applications previously. You will now discover how simple it is to achieve this using gRPC.
Communication Patterns in gRPC
There are four communication patterns that can be used in gRPC:
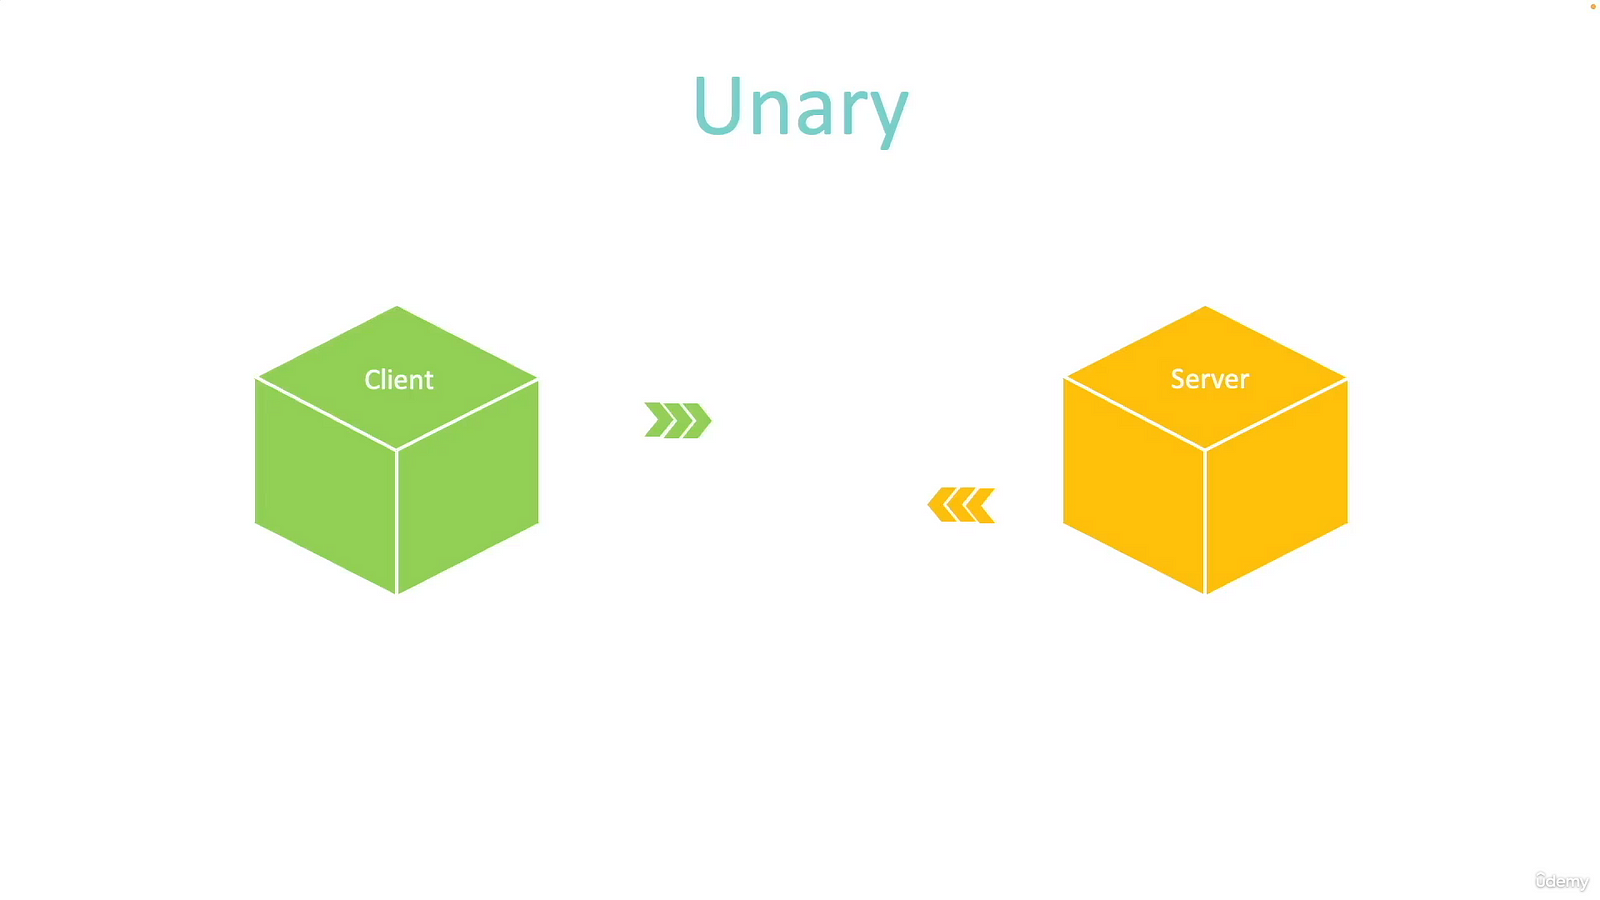
- Unary RPCs
A unary RPC is a simple request-response call. The client sends a request to the server, and the server responds back.
- Client streaming RPCs
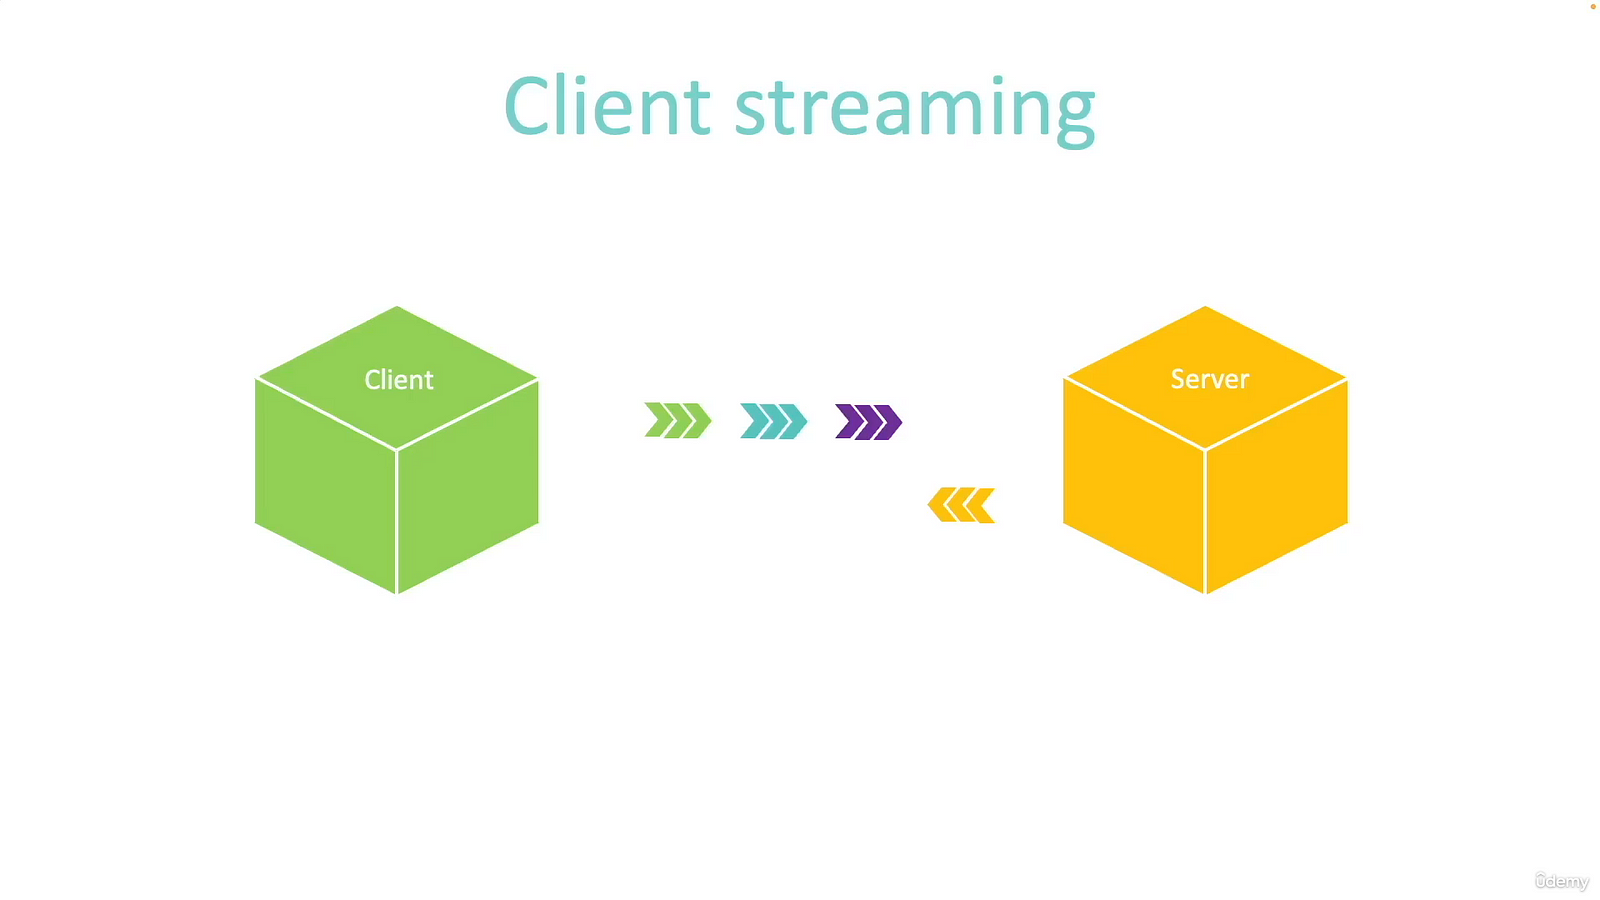
In client streaming, the client sends multiple requests to the server and receives a single response in return. This is beneficial when the client has to transfer a substantial amount of data to the server, and the server only needs to handle the data once.
- Server streaming RPCs
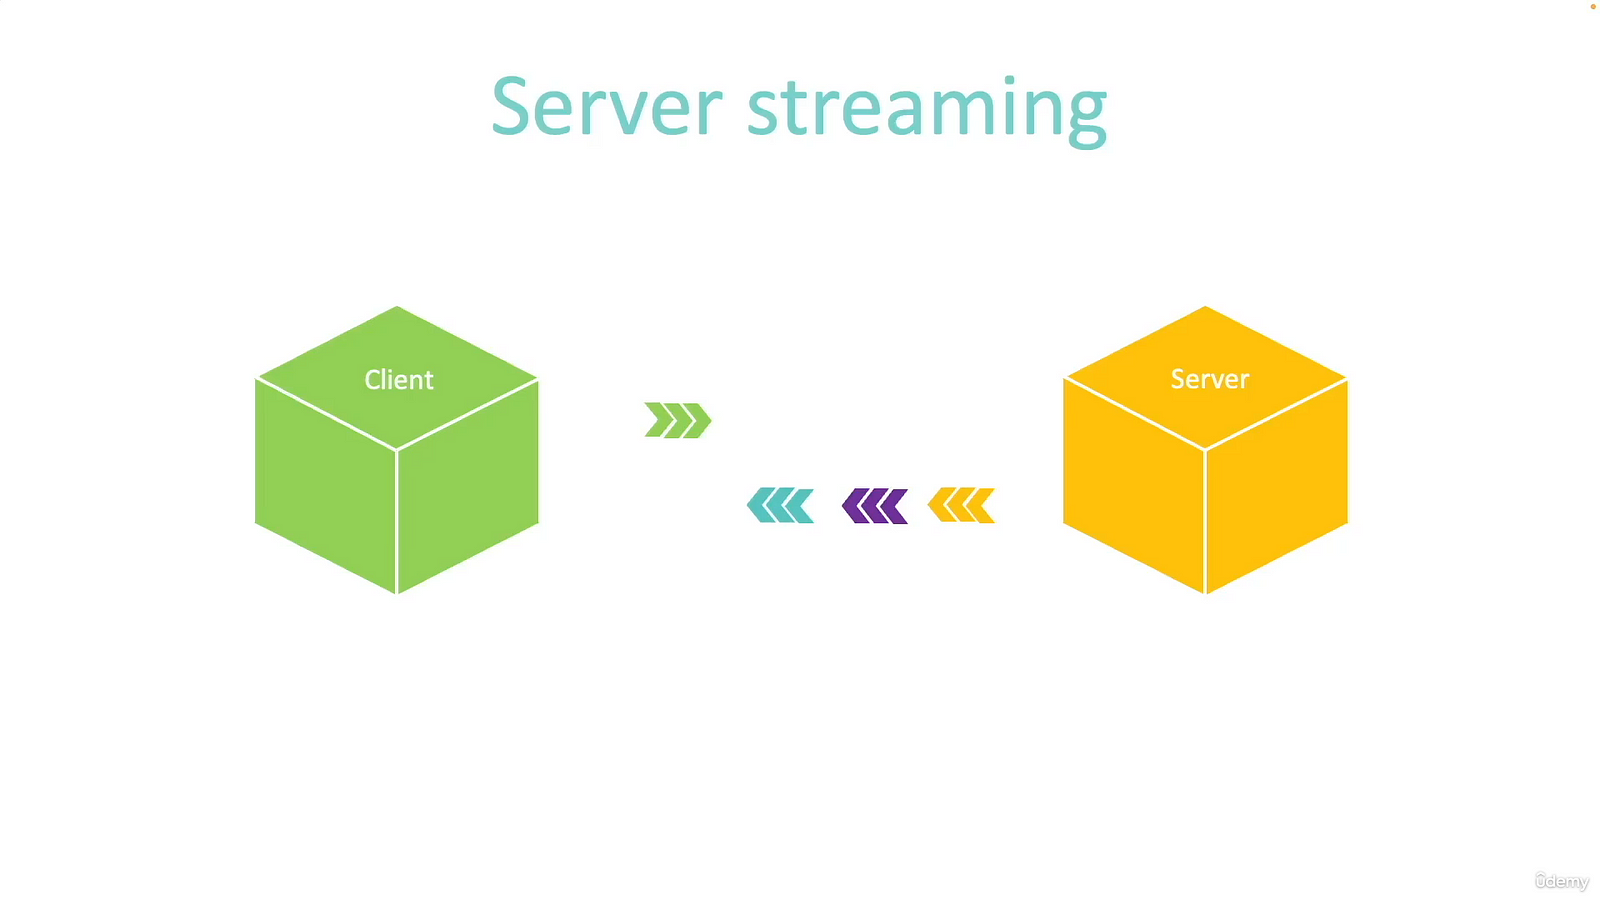
Server streaming RPC is a type of request where the client sends only one request to the server, but the server sends a continuous stream of responses back to the client. This is particularly helpful when the server needs to provide the client with a significant amount of data.
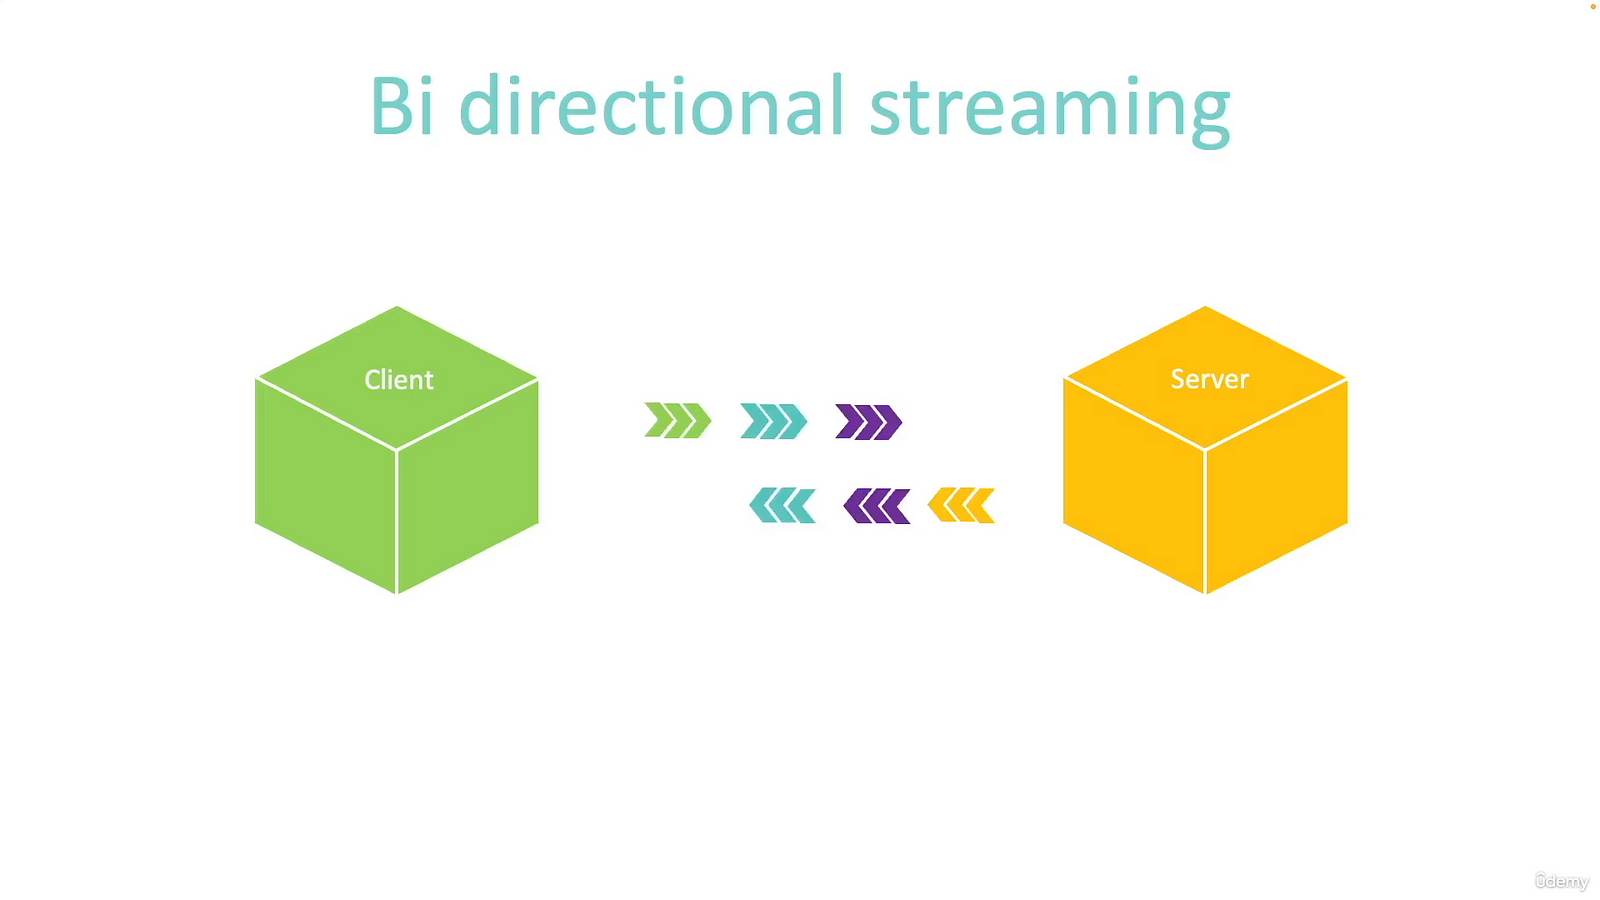
- Bidirectional streaming RPCS
In bi-directional streaming, both parties can exchange streams of requests and responses. This is particularly beneficial when there is a need for real-time communication between them.
gRPC vs REST
Before beginning the development of a full-stack application, it is crucial to understand the differences between gRPC and its closest alternative, REST.
- Data format: REST uses JSON or XML to encode data while gRPC uses protocol buffers with use binary serialization to encode data.
- Protocol: gRPC uses HTTP/2 protocol while REST is built on HTTP/1.1 protocol. HTTP/2 offers a number of performance improvements such as multiplexing, header compression, and bi-directional streaming.
- Communication Style: REST is limited to request-response communication patterns while gRPC supports client streaming, server streaming, and bi-directional streaming.
- API Design: REST is more focused on resource-based design, where URIs represent resources, and HTTP methods define the actions on those resources whereas gRPC uses strongly-typed interfaces with defined service contracts using Protocol Buffers and is usually associated with the contract-first design(free design) approach.
- Error Handling: REST relies on HTTP status codes and custom error messages in the response payload to communicate errors to clients whereas gRPC employs a rich status mechanism with detailed error codes and messages, making it easier for clients to handle errors effectively.
Now that you have an understanding of the distinction between REST and gRPC, it's time to delve into defining protocol buffers (also known as protobufs), which will be the tool you will be using.
Protocol Buffers
To create a protocol buffer, you write a .proto file that defines the data structure of your message. Here is an example of a protobuf:
syntax = "proto3";

message Book {
    string id = 1;
    string title = 2;
    string author = 3;
}

message BookList {
    repeated Book books = 1;
}

message Empty {}

service BookService {
  rpc CreateBook (Book) returns (Book);
  rpc GetBooks (Empty) returns (stream Booklist);
  rpc AddManyBooks (stream BookList) returns (Empty);
  rpc Books (stream BookList) returns (stream BookList);
}
The protocol buffer above can be broken down into two parts:
- Messages: These are the core of protocol buffers and define the structure of the data you want to serialize. A message is similar to a class in object-oriented programming and consists of fields with their data types and optional attributes. In the example above, the second message above define a list(take keen on the repeated keyword), while the last one defines an empty object.
- Services: These define the methods that can be called between the client and server. You invoke them similar to the way you invoke methods in classes in OOP. Each method requires defining the data passed in the request and response.
Project

By now, you likely have a basic understanding of gRPC. However, you may be curious to see it in action. Next, you will create a full-stack Flutter app using gRPC.
Prerequisites:
- Dart version 2.12 or higher, through the Dart or Flutter SDKs.
- Protocol buffer compiler. You can find this here.
- Dart plugin for protocol compiler: This will handle Dart's code generation. Install it by running this command in your terminal:
dart pub global activate protoc_plugin
You will be creating a library application that displays a list of books and attendants. You’ll also be able to add one or more items to the lists thus demonstrating all of the gRPC communication patterns in action.
Start by cloning this GitHub repository. Most of the UI has been written for you since this tutorial aims to help you understand how to use gRPC in Flutter. Please also check out the starter branch to begin working on the project.
git clone https://github.com/karokojnr/maktaba.git

git checkout starter
- Defining protobufs
The first step involves defining the Books and Attendants data structures and services inside a .proto file.
To achieve this, create a protobufs folder in the root of the project and inside it, create a dart project using the package template. This package will later be used in the server and client. You can achieve this by running the following commands in your terminal
mkdir protobufs

cd protobufs

dart create --template=package --force .
You can delete the example and test folders since you won’t need that.
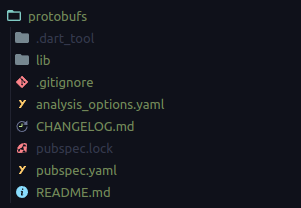
Install the grpc and protobuf libraries:
dart pub add protobuf grpc
Create another protobufs folder inside the root of protobufs folder. This is where .proto files will live.
Inside protobufs/protobufs create a file named book.proto . You are now ready to write your protobuf.
// 1
syntax = "proto3";

// 2
message Book {
    string title = 1;
    string author = 2;
}

// 3
message Attendant {
    string name = 1;
    string role = 2;
}

// 4
message AttendantsList {
    repeated Attendant attendants = 1;
}

// 5
message BookList {
    repeated Book books = 1;
}

// 6
message Empty {}

// 7
service BookService {
    // 7a). Unary
    rpc AddBook(Book) returns (Empty);
    // 7b). Client streaming
    rpc AddManyBooks(stream BookList) returns (Empty);
    // 7c). Server streaming
    rpc GetBooks(Empty) returns (stream BookList);
    // 7d). Bi-directional streaming
    rpc AddAttendants(stream AttendantsList) returns (stream AttendantsList);

}
- The first line of the
.protofile specifies the syntax of the file. In this case, itsproto3syntax. - The next bit represents a
Book meesage. This is a structured data object that contains a series of fields(name-value pairs). A field has a type, name, and tag. The name identifies the actual data, the type specifies the data type, and the tag identifies the position of the field since it’s represented in binary form. - Defines an
Attendantmessage, similar to theBookmessage. - A message that represents a list, in this case, a list of Attendants. You use the
repeatedkeyword to denote a list. - A message that defines a list of Books
- A message that represents an empty object.
- Represents a
service, which is a set of RPC methods exposed by a server. Each method has a request message and a response message. The request message is sent from the client to the server, and the response message is sent from the server to the client.
7arepresents a unary RPC. In this case, the client will add a book to the db by sending aBookrequest and receiving anEmptyobject in the response.7brepresents a client streaming RPC. The client will send a stream of Books (Booklist) and receive anEmptyobject.7crepresents a server streaming RPC. The client sends anEmptyobject and receives a stream of Books (Booklist).7drepresents a bi-directional streaming RPC. The client sends a stream of Attedants (AttendantsList) and receives a stream of Attedants (AttendantsList).
At this point, you can already notice the superiority of gRPC over REST, especially when dealing with streams of data, and how easily you can define that. Soon enough you’ll see how easy it is to invoke these methods from the client and the server.
2. Compiling the `.proto file
The next step is to use the Dart protoc compiler you installed earlier to generate the client and server stubs as well as messages.
A stub allows you to call the methods you defined in the .protofile. It has two main components:
- A channel: The channel represents a connection to the remote service.
- A service: The service object provides methods that correspond to the service’s methods.
Create a folder called generated inside the /lib/src folder. This is where all the stubs will be generated after running our protoc Dart compiler against the proto file you have created.
Run the following command in your terminal to generate the stubs:
protoc --dart_out=grpc:lib/src/generated -Iprotobufs protobufs/*
All this command does is generate stubs from all proto files inside the protobufs directory and store them inside lib/src/generated .
If you look inside the /lib/src/generated folder, you will find some generated files. This is what you will use to define services in the server and implement interfaces in the client.
Half of the work has been done for you at this point! You don’t have to worry about writing models/entities and services in the client or in the server. All you will do is the implementation of the already generated interfaces.
To export all the generated interfaces, add the following content inside lib/protobufs.dart.
library proto;

export 'src/generated/book.pb.dart';
export 'src/generated/book.pbenum.dart';
export 'src/generated/book.pbgrpc.dart';
export 'src/generated/book.pbjson.dart';

export 'package:grpc/grpc.dart';
The last line exports the grpc sever from the grpc package you imported inside the pubspec.yaml file.
3. Implementing the Server
The next step is writing the server code. This involves providing implementations for each method defined in your .proto file. These methods will be called when the client makes a request to the server.
Inside the root of the cloned project create a serverfolder and inside it, create a Dart project.
mkdir server

cd server

dart create --force .
Delete the test folder since we won’t need that.
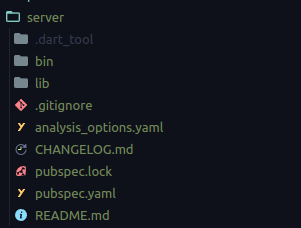
- Import the local
protobufslibrary you created in the first step, inside thepubscpe.yaml
...
publish_to: none
...

...
protobufs:
  path: ../protobufs
- Replace the content inside
bin/server.dartwith the following content, to create the server:
import 'dart:io';

import 'package:protobufs/protobufs.dart';
import 'package:server/services/book_service.dart';

void main(List<String> arguments) async {
  // 1
  final server = Server.create(
    services: [
      BookService(),
    ], // services to communicate with gRPC
  );

  // 2
  final port = int.parse(Platform.environment['PORT'] ?? '4000');
  await server.serve(
    port: port,
  );

  print('Server listening on port ${server.port}...🚀');
}
1 — You create a Server and pass a list of services that implement the methods/services you defined inside your .proto file.
2 — You serve your server on a certain port, in this case, 4000 .
At this point, you are probably experiencing an error since you haven’t yet defined your BookService .
The next step will be creating this BookService.
Inside lib folder, create two folders named data and services :
data
This will be responsible for getting the data from the database. For demonstration purposes, you will use hardcoded data as your database.
Inside this folder create two more folders, data_sources and db .
Create a file named data.dart inside data/db and add the following:
import 'package:protobufs/protobufs.dart';

final books = <Book>[
  Book()
    ..title = 'The Great Gatsby'
    ..author = 'F. Scott Fitzgerald',
  Book()
    ..title = 'The Grapes of Wrath'
    ..author = 'John Steinbeck',
  Book()
    ..title = 'Nineteen Eighty-Four'
    ..author = 'George Orwell',
];
This populates a list of Books. The Book model was generated when you ran the Dart protoc compiler. The compiler also generated the Attendant, AttendantsList, BookList, Empty for you as you’ll see later on.
Next, create a file named database_data_source.dart inside data/data_sources . This file is responsible for communicating directly with the database. Add the following content:
import 'package:protobufs/protobufs.dart';

import '../db/data.dart';

class DatabaseDataSource {
  // 1: Add Book to the db
  void addBook(Book book) => books.add(book);
  // 2: Add BookList to the db
  void addManyBooks(List<Book> books) => books.addAll(books);
  // 3: Get a list of books from the db
  List<Book> getBooks() => books;
}
services
This folder will implement the methods you defined inside the .proto file and communicate with the data folder you created above to update the DB.
Inside services add a file named book_service.dart and add the following:
import 'dart:async';

import 'package:protobufs/protobufs.dart';

import '../data/data_sources/database_data_source.dart';
import '../data/db/data.dart';

class BookService extends BookServiceBase {
  // 1.
  final DatabaseDataSource _databaseDataSource = DatabaseDataSource();

  // 2.
  final StreamController<List<Book>> _booksStream =
      StreamController.broadcast();

  // 3.
  @override
  Future<Empty> addBook(ServiceCall call, Book request) async {
    _databaseDataSource.addBook(request);
    _booksStream.add(books);
    return Empty();
  }

  // 4.
  @override
  Future<Empty> addManyBooks(ServiceCall call, Stream<BookList> request) async {
    // ! get the current list
    final List<Book> newBooks = books;
    await for (var bookList in request) {
      newBooks.addAll(bookList.books);
      if (bookList.books.isEmpty) break;
    }
    // !Add to existing list plus new books to stream
    _booksStream.add(newBooks);
    return Empty();
  }

  // 5.
  @override
  Stream<BookList> getBooks(ServiceCall call, request) async* {
    //! get current books
    yield BookList()..books.addAll(_databaseDataSource.getBooks());
    //! listen to any additions in the stream
    await for (var book in _booksStream.stream) {
      yield BookList()..books.addAll(book);
    }
  }

  // 6.
  @override
  Stream<AttendantsList> addAttendants(
      ServiceCall call, Stream<AttendantsList> request) async* {
    final List<Attendant> attendants = [];
    await for (var attendantList in request) {
      attendants.addAll(attendantList.attendants);
      if (attendantList.attendants.isEmpty) break;
    }
    yield AttendantsList()..attendants.addAll(attendants);
  }
}
As mentioned earlier, the BookService only performs the methods specified in the proto file. Your role is to implement these methods. Here's what the overridden methods do:
- Retrieve an instance of the class that contains methods for interacting with the database. (You defined this in the previous step)
- Create a StreamController that can be utilized to monitor the books present in the database.
- This method simply adds the
Bookobject from the client to thedband the stream defined above. - This function takes in a stream and adds all the Book objects to both the list and the StreamController. This illustrates a client streaming RPC.
- This method continuously generates a list of books(in the form of a stream) and monitors any engagement with the StreamController. This illustrates server streaming RPC.
- The final approach involves taking a stream of attendants' lists and producing a list of Attendants. This showcases bi-directional streaming RPC.
That's all there is to it on the server. Sounds easy enough. 😊
Finally, you will work on the client that will send request(s) to the server and the service you have implemented and receive responses back.
4. Implementing the Client
The next step involves utilizing the client stubs to access the methods that are available through the gRPC server. You’ll do this inside the client folder that you found when you cloned the repository.
This tutorial doesn't cover the UI(implemented for you) and only shows how to invoke the methods in the server. For state management and dependency injection, this project utilizes Riverpod and Riverpod Generator.
You may notice that the attendant and book models/entities don't have any implementations. This is because they were automatically generated by the protoc compiler, which reduces your workload. 😎
- Client stub
Import the local protobufs library you created, inside the pubscpe.yaml
  protobufs:
     path: ../protobufs
Next inside the root of the lib folder, create a file name client_stub.dart and add the following:
import 'package:flutter_riverpod/flutter_riverpod.dart';
import 'package:protobufs/protobufs.dart';

final stubProvider = Provider<BookServiceClient>((ref) {
  final channel = ClientChannel(
    'localhost',
    port: 4000,
    options: const ChannelOptions(
      credentials: ChannelCredentials.insecure(),
    ),
  );
  return BookServiceClient(channel);
});
This creates a connection to the gRPC server and provides methods that correspond to the service methods you defined in the .proto file. You will directly call these methods using the stub. Riverpod is used to make this stub available globally.
- Repository
The next step is to establish repositories that will outline the methods you plan to implement. These methods should match those used by the server but are not directly related to the gRPC server.
Inside /lib/domain/repository/attendant_repository.dart add the following:
import 'package:protobufs/protobufs.dart';

abstract class AttendantRepository {
  Future<void> addAttendats(List<Attendant> attendants);
  Stream<List<Attendant>> getAttendants();
}
This file defines two methods: one for adding a list of attendees and another for retrieving a list of attendees in the form of a stream.
Inside /lib/domain/repository/book_repository.dart , add the following:
import 'package:protobufs/protobufs.dart';

abstract class BookRepository {
  Future<void> addBook(Book book);
  Future<void> addManyBooks(List<Book> books);
  Stream<List<Book>> getBooks();
}
This file defines methods for:
- adding a book to the data source.
- adding many books to the data source.
- Retrieving a stream of books from the data source.
3. Repository Implementations
The next step involves implementing the repositories you’ve created above.
Inside /lib/data/repository/attendant_repository_impl.dart add:
import 'dart:async';

import 'package:protobufs/protobufs.dart';

import '../../domain/domain.dart';

class AttendantRepositoryImpl extends AttendantRepository {
  AttendantRepositoryImpl(this._stub);
  final BookServiceClient _stub;

  // 1
  final StreamController<List<Attendant>> _attendantsStreamController =
      StreamController.broadcast();

  // 2
  @override
  Future<void> addAttendats(List<Attendant> attendants) async {
    final resultStream = _stub
        .addAttendants(_generateAttendantsList(attendants))
        .map((e) => e.attendants);
    _attendantsStreamController.sink.addStream(resultStream);
  }

  // 3
  @override
  Stream<List<Attendant>> getAttendants() async* {
    bool streamEmpty = !_attendantsStreamController.hasListener;
    if (streamEmpty) yield [];
    yield* _attendantsStreamController.stream;
  }


  Stream<AttendantsList> _generateAttendantsList(
      List<Attendant> attendants) async* {
    yield AttendantsList()..attendants.addAll(attendants);
  }
}
Inside /lib/data/repository/book_repository_impl.dart add:
import 'dart:async';

import 'package:protobufs/protobufs.dart';

import '../../domain/domain.dart';

class BookRepositoryImpl implements BookRepository {
  BookRepositoryImpl(this._stub);
  final BookServiceClient _stub;

  @override
  Future<void> addBook(Book book) => _stub.addBook(book);

  @override
  Future<void> addManyBooks(List<Book> books) =>
      _stub.addManyBooks(_generateBookList(books));

  @override
  Stream<List<Book>> getBooks() async* {
    yield* _stub.getBooks(Empty()).map((e) {
      if (e.books.isEmpty) return [];
      return e.books;
    });
  }

  Stream<BookList> _generateBookList(List<Book> books) async* {
    yield BookList()..books.addAll(books);
  }
}
The last thing to do in this step is to provide the implementation of these repository implementations using Riverpod:
Inside /lib/data/repository/repository.dart , add the following:
import 'package:flutter_riverpod/flutter_riverpod.dart';

import '../../client_stub.dart';
import '../../domain/domain.dart';
import 'attendant_repository_impl.dart';
import 'book_repository_impl.dart';

final bookRepositoryProvider = Provider<BookRepository>(
    (ref) => BookRepositoryImpl(ref.read(stubProvider)));

final attendantRepositoryProvider = Provider<AttendantRepository>(
    (ref) => AttendantRepositoryImpl(ref.read(stubProvider)));
- Usecases
Next up are usecases that you’ll use to communicate to the repositories from your presentation layer.
a. add_attendants.dart
import 'package:protobufs/protobufs.dart';

import '../domain.dart';

class AddAttendants {
  AddAttendants(this._attendantRepository);
  final AttendantRepository _attendantRepository;

  Future<void> execute(List<Attendant> attendants) =>
      _attendantRepository.addAttendats(attendants);
}
b. add_book.dart
import 'package:protobufs/protobufs.dart';

import '../repository/repository.dart';

class AddBook {
  final BookRepository _bookRepository;
  AddBook(this._bookRepository);

  Future<void> execute(Book book) => _bookRepository.addBook(book);
}
c. add_many_books.dart
import 'package:protobufs/protobufs.dart';

import '../repository/repository.dart';

class AddManyBooks {
  final BookRepository _bookRepository;
  AddManyBooks(this._bookRepository);

  Future<void> execute(List<Book> books) => _bookRepository.addManyBooks(books);
}
d. get_attendants.dart
import 'package:protobufs/protobufs.dart';

import '../repository/repository.dart';

class GetAttendants {
  GetAttendants(this._attendantRepository);
  final AttendantRepository _attendantRepository;

  Stream<List<Attendant>> execute() async* {
    yield* _attendantRepository.getAttendants();
  }
}
e. get_books.dart
import 'package:protobufs/protobufs.dart';

import '../repository/repository.dart';

class GetBooks {
  final BookRepository _bookRepository;
  GetBooks(this._bookRepository);

  Stream<List<Book>> execute() async* {
    yield* _bookRepository.getBooks();
  }
}
Last but not least you need to provide the usecases using Riverpod. Inside lib/domain/usecases/usecases.dart , add:
import 'package:flutter_riverpod/flutter_riverpod.dart';
import 'package:protobufs/protobufs.dart';

import '../../data/data.dart';
import 'add_attendants.dart';
import 'add_book.dart';
import 'add_many_books.dart';
import 'get_attendants.dart';
import 'get_books.dart';

final addBookProvider =
    Provider<AddBook>((ref) => AddBook(ref.read(bookRepositoryProvider)));

final addManyBooksProvider = Provider<AddManyBooks>(
    (ref) => AddManyBooks(ref.read(bookRepositoryProvider)));

final booksStreamProvider = StreamProvider<List<Book>>(
    (ref) => GetBooks(ref.watch(bookRepositoryProvider)).execute());

final addAttendantsProvider = Provider<AddAttendants>(
    (ref) => AddAttendants(ref.read(attendantRepositoryProvider)));

final attendantsStreamProvider = StreamProvider<List<Attendant>>(
    (ref) => GetAttendants(ref.watch(attendantRepositoryProvider)).execute());
- Controllers
You are edging closer to seeing gRPC in action. This step involves setting up state management using Riverpod 2.0 & Riverpod generator.
Inside lib/presentation/controllers , there are two files named attendants_dialog_controller.dart and book_dialog_controller.dart which you’ll use.
a. attendants_dialog_controller.dart
import 'package:protobufs/protobufs.dart';
import 'package:riverpod_annotation/riverpod_annotation.dart';

import '../../config/config.dart';
import '../../core/mixins/notifier_mounted.dart';
import '../../domain/domain.dart';

part 'attendants_dialog_controller.g.dart';

@riverpod
class AttendantsDialogController extends _$AttendantsDialogController
    with NotifierMounted {
  @override
  FutureOr<void> build() {
    // no-op
  }

  Future<void> addAttendants(List<Attendant> attendants) async {
    state = const AsyncValue.loading();
    final value = await AsyncValue.guard(
        () => ref.read(addAttendantsProvider).execute(attendants));
    if (mounted) {
      state = value;
    }
    ref.read(goRouter).pop();
  }
}
b. book_dialog_controller.dart
import 'package:protobufs/protobufs.dart';
import 'package:riverpod_annotation/riverpod_annotation.dart';

import '../../config/config.dart';
import '../../core/mixins/notifier_mounted.dart';
import '../../domain/domain.dart';

part 'book_dialog_controller.g.dart';

@riverpod
class BookDialogController extends _$BookDialogController with NotifierMounted {
  @override
  FutureOr<void> build() {
    ref.onDispose(setUnmounted);
    // no-op
  }

  Future<void> addBook(Book book) async {
    state = const AsyncValue.loading();
    final value =
        await AsyncValue.guard(() => ref.read(addBookProvider).execute(book));
    if (mounted) {
      state = value;
    }
    ref.read(goRouter).pop();
  }

  Future<void> addManyBooks(List<Book> books) async {
    state = const AsyncValue.loading();
    final value = await AsyncValue.guard(
        () => ref.read(addManyBooksProvider).execute(books));
    if (mounted) {
      state = value;
    }
    ref.read(goRouter).pop();
  }
}
To eliminate the errors, run the following command in your terminal that will generate the necessary files for your Riverpod Async class.
flutter packages pub run build_runner build --delete-conflicting-outputs
- UI
As earlier mentioned, this article does not focus on the UI. The main focus is demonstrating how the potential of gRPC can be leveraged to create full-stack applications in Flutter.
You’ll use dialogs to add books and attendants to the DB via the server you created earlier.
a. Book dialog
Inside lib/presentation/components/book_dialog.dart , replace // TODO: add provider listener with the following:
ref.listen<AsyncValue>(
  bookDialogControllerProvider,
  (_, state) => state.showAlertDialogOnError(context),
);

final state = ref.watch(bookDialogControllerProvider);
Book book = Book();
This adds a listener of the book_dialog_controller.dart async class in case there are errors when adding books.
You’ll use the state to check loading states.
Remember to import the protobufs library and the path to the book_dialog_controller.dart .
import "package:protobufs/protobufs.dart";
import "../controllers/book_dialog_controller.dart";
Start by replacing // todo: explicitly define list type with the following to avoid errors later on:
final List<Book> _selectedBooks = [];
Next, replace the line // TODO: set book title with:
onChanged: (value) => book.title = value,
Do the same with // TODO: set book author to set the book author value:
onChanged: (value) => book.author = value,
Next up, add the functionality to add a book to the _selectedBooks list by replacing // TODO: add book to list:
setState(() {
  _selectedBooks.add(book);
});
To add book(s) to the db on button press, replace // TODO: add book(s) to db with:
final controller = ref.watch(bookDialogControllerProvider.notifier);
widget.addingMany && _selectedBooks.isNotEmpty
    ? await controller.addManyBooks(_selectedBooks)
    : await controller.addBook(book);
Lastly in the BookDialog, change all instances of the loading boolean to state.isLoading in order to listen to loading states in the controller. After this, you can now delete the loading Boolean.
b. Attendants dialog
You will follow the same steps as in the BookDialog :
// todo: explicitly define list type
final List<Attendant> _addedAttendants = [];
// TODO: add provider listener
import 'package:protobufs/protobufs.dart';
import '../controllers/attendants_dialog_controller.dart';

...
...

ref.listen<AsyncValue>(
   attendantsDialogControllerProvider,
   (_, state) => state.showAlertDialogOnError(context),
);
final state = ref.watch(attendantsDialogControllerProvider);
Attendant attendant = Attendant();
// TODO: set attendant name
onChanged: (value) => attendant.name = value,
// TODO: set attendant role
onChanged: (value) => attendant.role = value,
// TODO: add attendant to list
setState(() {
   _addedAttendants.add(attendant);
});
// TODO: add attendants to db
final controller = ref.watch(attendantsDialogControllerProvider.notifier);
await controller.addAttendants(_addedAttendants);
- Replace
loadingwithstate.isLoadingand delete theloadingvariable.
The last step is rendering the list of attendants and books inside the views. For this implementation, you will use an AsyncValue to get and render the list of data. There’s a custom AsyncValueWidget already in existence that has an AsyncValue property to render this list.
a. BooksView
Replace // TODO: add books list with:
import 'package:protobufs/protobufs.dart';
import '../../domain/domain.dart';
..
..
Expanded(
   child: AsyncValueWidget<List<Book>>(
       value: ref.watch(booksStreamProvider),
       data: (books) => books.isEmpty
           ? const Center(child: Text('not books founds'))
           : ListView.builder(
               itemCount: books.length,
               itemBuilder: (context, index) {
                 final book = books[index];
                 return ListTile(
                   title: Text(book.title),
                   subtitle: Text(book.author),
                 );
               })),
 ),
b. AttendantsView
Replace // TODO: add attendants list with:
import 'package:protobufs/protobufs.dart';
import '../../domain/domain.dart';
..
..

Expanded(
   child: AsyncValueWidget<List<Attendant>>(
       value: ref.watch(attendantsStreamProvider),
       data: (attendants) => attendants.isEmpty
           ? const Center(child: Text('not attendants founds'))
           : ListView.builder(
               itemCount: attendants.length,
               itemBuilder: (context, index) {
                 final attendant = attendants[index];
                 return ListTile(
                   title: Text(attendant.name),
                   subtitle: Text(attendant.role),
                 );
               })),
 ),
gRPC in action
Now, it is time to review what you have been working on. Open two instances in your terminal, one to run the server and the other to run the client.
Start your server by navigating to the server directory and running the server.
cd server

dart bin/server.dart
In the second terminal instance, navigate to the client directory and run the application.
cd client

flutter run
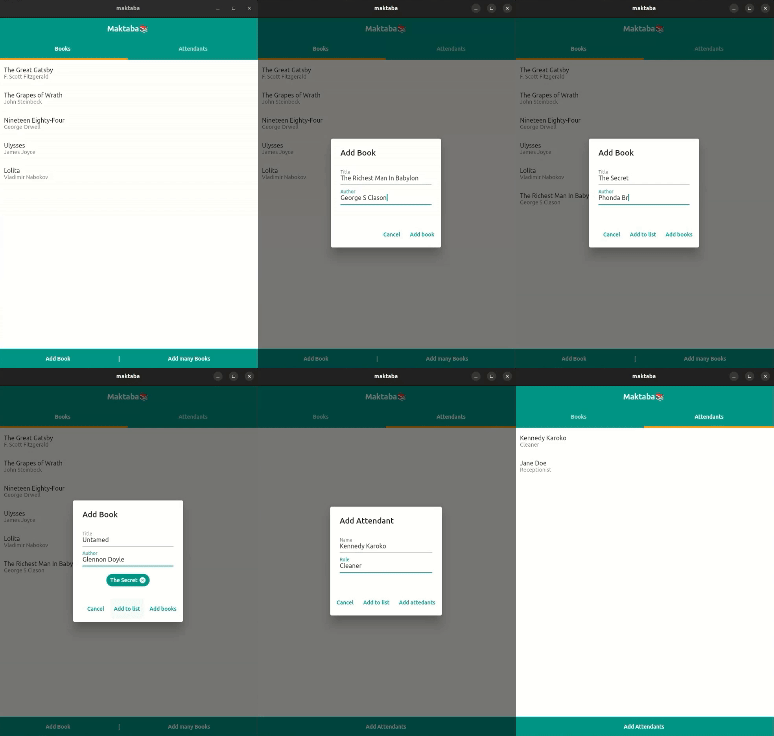
You have successfully created a full-stack application in Flutter where you can add books and attendants and listen to streams of the latter, all via the power of gRPC. 🎉

Conclusion
In this article, you were introduced to gRPC and learned about the available options for creating full-stack Flutter applications, their limitations, and how gRPC can leverage them.
After learning how to write protocol buffers, you created a full-stack application using the entities, models, and repositories generated by gRPC for both the server and the client.
You may have found it surprisingly easy. The GitHub repository with the final code is available here.
Don't forget to follow me for more articles. I'll be signing off for now. Take care and bye 👋.